I often start with a cute fabric for the center, cut into a wacky 4 or 5 sided shape. Then I sew a fabric onto one side. I do have a couple rules for doing these blocks. Rule #1 Sew onto the longest edge. If you don't, the block will grow lengthwise and not square. You can sew scraps onto the pieces or chain piece onto a long strip. (Obviously if you are trying to use up scraps, go with those first, then save strips for when it gets bigger)
If I am working with strips (like the gray project), I start by sewing a couple strips together and then cut that into a trapezoid or 5-sided shape.
Next step: Press to the added piece. Next step: Trim
You will repeat this process just like a log cabin, going around and around, trimming after each pressing. This brings me to my Rule #2 Avoid parallel lines If you are sewing onto a strip like the gray ones, the edges are parallel. So when you trim, cut the outside edge to be wacky. The straight strips really catch the eye so it is a good idea to wacky them up a bit!
Rule #3 Try to have a bit of each color you are using in each block. If I'm doing brights I make sure there is at least one yellow and one orange in each block, for example. This will make the whole quilt blend together better.
You are going to keep going log cabin style until you have a square the size you want. I recommend using a square ruler the size of your finished blocks. I have a 6 1/2" and an 8 1/2" square so those are my block sizes, usually. It helps you to better see the block building up and helps you decide where the corners are. I've been known to put a pin in a corner as I'm going along, so I don't accidentally add onto the wrong side.
Save all the odd pieces left over. You can put them in another block! If you cut all your strips the same width (2 to 2 1/2" is good) you can join them together and use them as one piece.
My last rule is Try to not have large pieces that stand out. As you get to the end the pieces get bigger. I like to save really busy fabrics for those places because they will blend in better and not stand out. Solids and blenders stand out more, and are better on the insides.
Another hint: if you need to make 40 blocks, start with 20. As you go along, you'll have lots of scraps cut off that are too small for these big blocks but perfect for new blocks. So when I do these I have blocks in a variety of stages at the same time.
You don't have to think of these finished blocks as just squares. I admit it had never occurred to me to cut them up. I learned this at a Runamok meeting where we learned how to do this technique. I obviously didn't need the tutorial, I had been doing this for 20 years or more! But a modern quilter somewhere came up with the idea of using these blocks like a piece of fabric. The two pastels quilts at the end have cut up squares as triangle units. My gray project will be a cut-up also, I can't wait to finish it!
Good luck! (Especially you, Susie)
 |
| Center block cut 4-sided |
 |
| Center block cut sided |
 |
| Adding a scrap for the next round |
 |
| Strip piecing onto a long strip |
 |
| Crazy medalion style with blocks cut into triangles on the borders. |
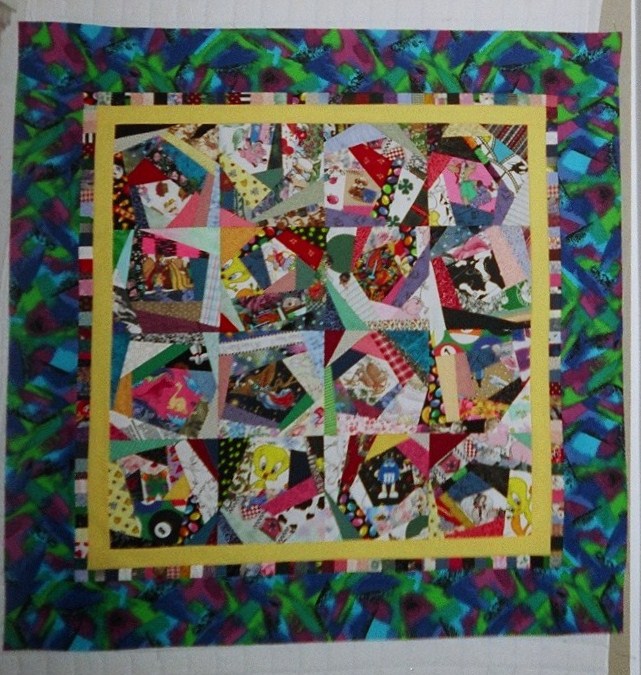 |
| Bright "I Spy" |
 |
| Crazy blocks in controlled palette. Each one has a nice center block. |
 |
| Crazy blocks cut into triangles to make a star. |