 |
| Zigzag 9-patch made in an afternoon workshop |
Not only did I learn this technique but went away with a great handout of different settings which I have used and shared with every class I taught. So thank you, Marianne!
 |
| Line the strip set up with cutting board lines |
 |
| Place 2nd strip down from 1st strip about 1/2" down |
 |
| Lay out all strips until you have no more room |
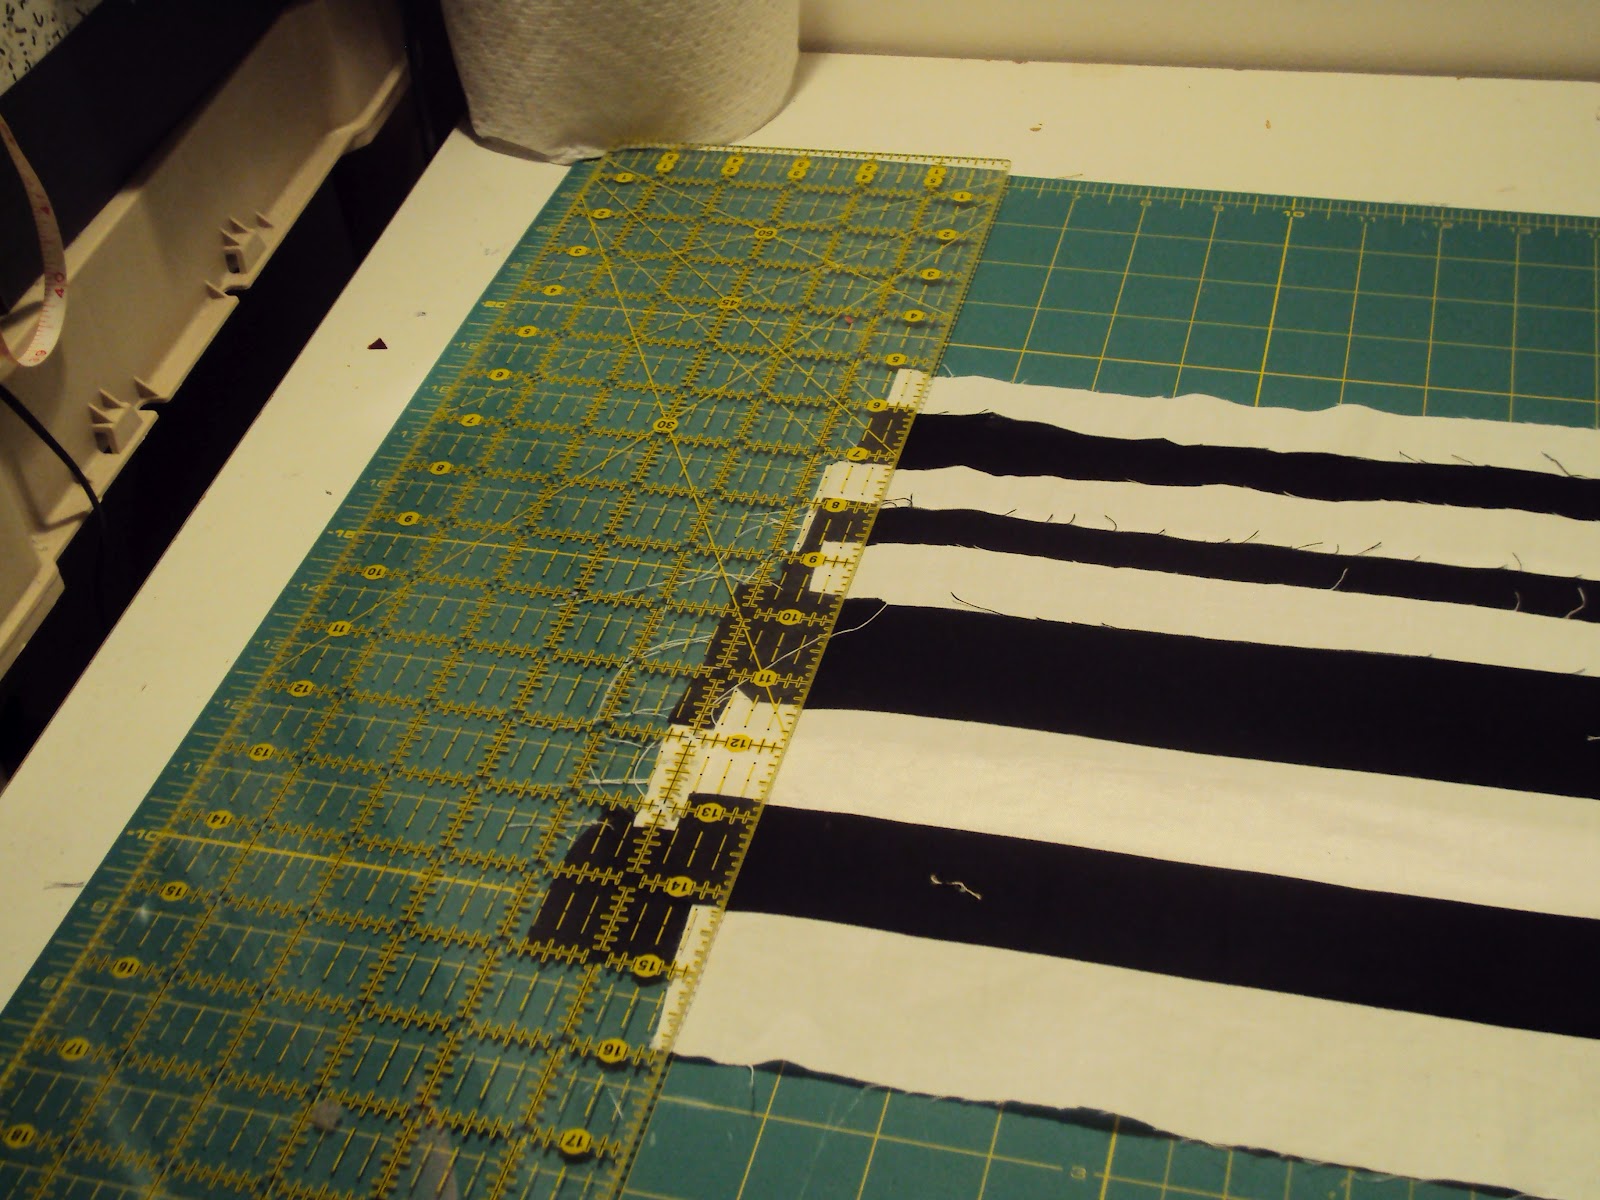 |
| Line up ruler w/ vertical lines, then cut the bruised edges off |
 |
| Cut through all layers (the same measurement as width of strips) |
The great time saving technique is especially great for 9-patches. You start by sewing the strips in groups of 3--2 sets of dark/light/dark and 1 set of light/dark/light. (It is important when sewing strip sets together that you sew top to bottom, then bottom to top, then top to bottom, etc. or else your strip set will stretch and curve and you don't want that.) Press the seams toward the darks. Let's go with 2" strips for the sake of this exercise. After the strips are pressed, line up one piece on your cutting mat using the lines on the mat as a straight line. Take the next strip set and stagger it about 1/2" down from the first, making sure that you are far enough down that the seams aren't on top of each other. Keep laying down as many strips as you can fit on the board, keeping the strips straight using the lines on the mat. You will then cut 2" pieces all along the whole thing. This works so well for several reasons--You can cut a lot of strips in 1 cut, and because the strips are all stuck together and lined up with the lines on the mat they do not slip and you get nice straight cuts, and you are never cutting through more than 4-6 layers of fabric at a time. Try it and you will wonder why you spent so much time sub cutting before!
 |
| Continue cutting to the end of pieces |
(I apologize for the confusing pictures. I am working with black and white and actually thought it would make a good demo, but you can't tell where one piece starts and the next begins! I placed them on the board alternating black and white so in the final layout there are 6 strip sets. Hope you can figure this out)
This comment has been removed by a blog administrator.
ReplyDelete